As Amazon Associates, we earn from qualifying purchases. This means we may receive a small commission at no extra cost to you if you click through and make a purchase.
Operating a desktop 3D printer in a busy household often introduces persistent mechanical whine, but installing the Creality Ender 3 Silent Board provides a direct, factory-engineered hardware solution to restore domestic calm. Designed as an upgraded V4.2.7 mainboard, this electronic drop-in replacement swaps out noisy legacy stepper motor controllers for advanced silent drivers, dropping acoustic operational levels below 50 decibels. For families who rely on the creality ender 3 pro for classroom STEM assignments, creative toys, or practical home repairs, this component upgrade effectively transforms an otherwise buzzing workshop machine into a discreet household appliance.
This silent mainboard suits budget-conscious families and makers who want significant creality ender 3 pro noise reduction without the expense of purchasing an entirely new 3D printer. If your printer sits in a shared family room, a home office, or a bedroom hallway, the drop in mechanical sound output makes overnight printing practical. However, hobbyists who dislike basic electronics maintenance, or those who demand modern perks like native multi-color extrusion and hands-off automated calibration right out of the box, should consider complete printer replacements rather than an internal motherboard swap.
Creality Ender 3 Silent Board at a Glance

| Attribute | Detail |
|---|---|
| Brand | Creality |
| Model Name | Ender 3 Upgraded Silent Board V4.2.7 |
| Model Number | Creality Ender 3 Mainboard |
| Stepper Motor Drivers | TMC2225 ultra-quiet motor drive chips |
| Firmware Version | V0.0.6 / V1.0.6 based on Marlin 2.0.1 |
| Bootloader | Pre-installed |
| Operational Sound Level | Under 50 decibels (<50dB) |
| Voltage Rating | 24V Input / 12V Output |
| Item Weight | 4.2 ounces |
| Direct Compatibility | Ender 3, Ender 3 Pro, Ender 3 V2, Ender 3 Max, Ender 3 Neo, Ender 3 V2 Neo, Ender 3 Max Neo |
Acoustic Performance and Household Noise Reduction
The primary motivation for installing the creality ender 3 pro silent board is acoustic comfort within shared domestic living spaces. Standard factory motherboards on earlier machines utilized basic stepper driver chips that generated high-frequency harmonics as electric pulses cycled through the motor coils. This electrical cycling translated into mechanical singing, rhythmic chirping, and continuous whining whenever the print head moved across the build area. By integrating specialized driver hardware, the V4.2.7 mainboard suppresses these resonant electrical frequencies at the source.
Creality rates the operating sound level of this silent mainboard below 50 decibels during standard operation. In a family setting, this acoustic threshold falls between the quiet hum of a modern household refrigerator and gentle background conversation. When evaluating a creality ender 3 v3 se or an upgraded older Ender, sound dampening makes a massive difference in daily livability. The high-pitched electronic oscillations disappear completely, leaving only the steady whoosh of the cooling fans and the subtle mechanical roll of the rubber V-wheels along the aluminum extrusions.
For home printing enthusiasts, this acoustic transformation reshapes how and when the machine can run. Long, complex prints spanning ten to twenty hours no longer need to be restricted to daytime hours when background household noise can drown out the printer. The reduction in mechanical pitch allows families to place the creality ender 3 pro for home use in secondary rooms, basements, or dedicated study areas without disrupting homework, virtual office calls, or sleep schedules.
Stepper Driver Architecture and Hardware Specifications
Behind the sound reduction lies the ender 3 pro tmc2225 driver architecture embedded directly into the circuit design. The TMC2225 motor driver chips modulate electric current sent to the stepper motors using ultra-smooth micro-stepping interpolation. Instead of harsh step transitions that rattle motor stators, the driver chip feeds gradual, continuous electrical waves into the X, Y, Z, and extruder stepper motors. This smooth current delivery eliminates the sharp resonance that plagues legacy motherboards.
Examining the formal creality ender 3 pro specs for this component reveals an efficient, compact hardware footprint. Weighing just 4.2 ounces, the board incorporates integrated surface-mount drivers rather than tall, detachable modules. The power circuitry is engineered for a 24V power supply input with 12V output regulation, matching the native voltage rail found on the standard Ender 3 and Ender 3 Pro electrical systems. The listing specifies integrated graphics processing support, a dedicated TMC2225 chipset family, and seamless connection to external control computers or laptops.
Thermal management is equally crucial for long-term reliability in family households where prints run unattended for hours. The V4.2.7 design positions passive heat sinks over the TMC2225 driver chips to dissipate operational heat directly into the internal enclosure airflow. Because the drivers run efficiently and resist overheating, the board prevents layer shifting caused by skipped steps or thermal driver shutdowns, safeguarding extended print jobs from frustrating mid-print failures.
Firmware Architecture and Marlin 2.0.1 Integration
A major technical hurdle on older 8-bit Creality motherboards was the lack of internal memory and absent bootloaders, which forced owners to use external development boards just to flash updated software. The ender 3 v4.2.7 board upgrade resolves this issue by integrating a 32-bit architecture with a factory pre-installed bootloader. The mainboard ships from Creality with firmware version V0.0.6 or V1.0.6, built directly on marlin 2.0.1 ender 3 pro codebases.
Firmware updating is remarkably straightforward and requires no specialized programming knowledge or cable connections. According to Creality’s official documentation, the process relies entirely on a standard micro-SD card:
- Format a compatible micro-SD card and ensure no other files remain on the storage drive.
- Download and copy the machine-specific V4.2.7 firmware binary file onto the clean card.
- Power down the 3D printer completely and remove the primary power cord from the wall outlet.
- Insert the micro-SD card into the mainboard card slot, reconnect the power cord, and switch the power unit on.
- Wait approximately 10 seconds for the integrated bootloader to automatically detect, flash, and finalize the new Marlin 2.0.1 firmware.
While the board comes pre-configured for immediate plug-and-play operation on the baseline Ender 3, users installing the board into an Ender 3 Pro, Ender 3 V2, or Ender 3 Max must flash the corresponding firmware file. This step ensures that bed travel limits, thermistor definitions, and display menus align correctly with your specific machine geometry. Upgrading the firmware also establishes a stable base should you later add mechanical upgrades like a textured spring steel sheet or an advanced creality ender 3 s1 pro build surface.
Step-by-Step Enclosure Access and Installation Process
Executing an ender 3 silent motherboard installation is a manageable weekend project, but it requires careful organization and basic safety habits. The physical motherboard sits inside a metal electronics housing secured to the lower front-left frame extrusion. Before loosening any screws, always turn off the master power switch, disconnect the power cable from the wall, and verify that the print bed and hotend have cooled down to room temperature.
Once you remove the enclosure lid, you will encounter a bundle of wiring harnesses secured by hot-melt glue at the factory connectors. The safest installation approach is a direct terminal-to-terminal swap:
- Take clear reference photographs of the original motherboard wiring from multiple angles before unplugging any leads.
- Carefully peel away any flexible factory glue securing the plastic JST plugs for the stepper motors and endstop switches.
- Transfer wires one at a time from the old board to the identical terminal positions on the new V4.2.7 silent board.
- Use an appropriately sized terminal screwdriver to clamp the stripped copper ends of the power supply and heated bed wires firmly into the screw terminals.
- Fasten the new 4.2-ounce mainboard into the metal chassis using the original mounting holes, tuck the wiring bundle neatly inside, and replace the enclosure panel.
Firmly seated wiring connections are vital for home safety, especially regarding the heavy-gauge 24V input lines and heated bed screw terminals. Taking the time to ensure bare wire ends do not fray or cross adjacent terminals guarantees reliable long-term service. Once secured, powering on the unit will immediately demonstrate the change, as the stepper motors initialize silently without their familiar mechanical chatter.
Evaluating Long-Term Practical Value and Usability
Prospective buyers frequently ask: is creality ender 3 pro silent board worth it compared to simply replacing the entire machine? When considering household budgets and environmental waste, upgrading existing hardware often represents the smarter, more rewarding path. A standard Ender 3 or Ender 3 Pro features sturdy aluminum extrusions, reliable lead screws, and readily available replacement parts that can last for years with basic care.
Instead of discarding a capable mechanical chassis, adding the V4.2.7 silent mainboard modernizes the printer’s core processing and acoustic footprint. This practical upgrade delivers modern operating noise levels while allowing families to preserve their existing spare nozzles, bed surfaces, and familiarity with slicing profiles. Comparing this incremental path to larger commercial platforms like the creality ender 5 max illustrates how targeted component swaps provide high utility without commanding major workshop space.
Beyond quiet operation, working through the motherboard replacement serves as a rich educational project for older children and parents exploring electronics together. Handling terminal blocks, observing circuit board traces, and understanding stepper motor driver chips demystifies how modern digital fabrication tools function. Creality also backs the hardware with 24-hour technical support, providing reassurance if troubleshooting assistance is needed during setup.
Creality Ender 3 Silent Board Pros and Cons
Pros
- TMC2225 drivers reduce operating noise under 50dB
- Pre-installed bootloader for simple micro-SD card flashing
- Direct drop-in compatibility for Ender 3 frame
- Pre-installed Marlin 2.0.1 firmware
- 24-hour manufacturer technical support
Cons
- Requires manual terminal rewiring and chassis disassembly
- Requires firmware flash for Ender 3 Pro
- Does not reduce cooling fan sound
Who Should Buy the Creality Ender 3 Silent Board
Buy It If
- You currently own an Ender 3 or Ender 3 Pro and want to eliminate high-pitched stepper motor whine in a shared family environment.
- You want a direct drop-in replacement motherboard that matches factory mounting points, terminal connectors, and 24V electrical rails.
- You want the convenience of a 32-bit board with a pre-installed bootloader for painless firmware updates via micro-SD card.
- You prefer repairing and extending the operational life of your existing hardware rather than buying a completely new 3D printer.
Skip It If
- You prefer an out-of-the-box, fully enclosed CoreXY 3D printer with multi-color capabilities that requires no wiring or disassembly.
- You are uncomfortable working with small electronics tools, screw terminals, and circuit board connectors.
- Your 3D printer already contains a V4.2.2 or V4.2.7 silent motherboard equipped with factory TMC stepper drivers.
Creality Ender 3 Silent Board Alternatives Worth a Look
If you decide that opening an electronics enclosure to replace a motherboard is not the right fit for your household, several modern, fully assembled 3D printers offer whisper-quiet operation and cutting-edge features straight out of the packaging.
MakerWorld Model Library
Our score: 8.4/10

The MakerWorld Model Library package highlights the Bambu Lab P1S Combo, featuring an enclosed CoreXY high-speed architecture paired with the AMS multi-color printing system. This ready-to-use machine provides fully automated bed leveling, integrated model library support, and multi-filament capabilities without requiring any aftermarket component upgrades. Busy families who want advanced multi-color capabilities and immediate setup rather than component rewiring should look closely at this complete system.
FLASHFORGE Adventurer 5M 3D Printer
Our score: 8.4/10

The FLASHFORGE Adventurer 5M 3D Printer presents a modern CoreXY all-metal platform engineered for maximum printing speeds up to 600mm/s. It features full auto bed leveling, a 220x220x220mm build volume, and a direct extruder equipped with a convenient 3-second detachable nozzle capable of reaching 280°C. Hobbyists who want rapid print speeds and push-button bed leveling out of the box will find this standalone printer a compelling alternative to modifying an older bed-slinger machine.
Beginner-Friendly Ecosystem with MakerWorld Model
Our score: 8.8/10
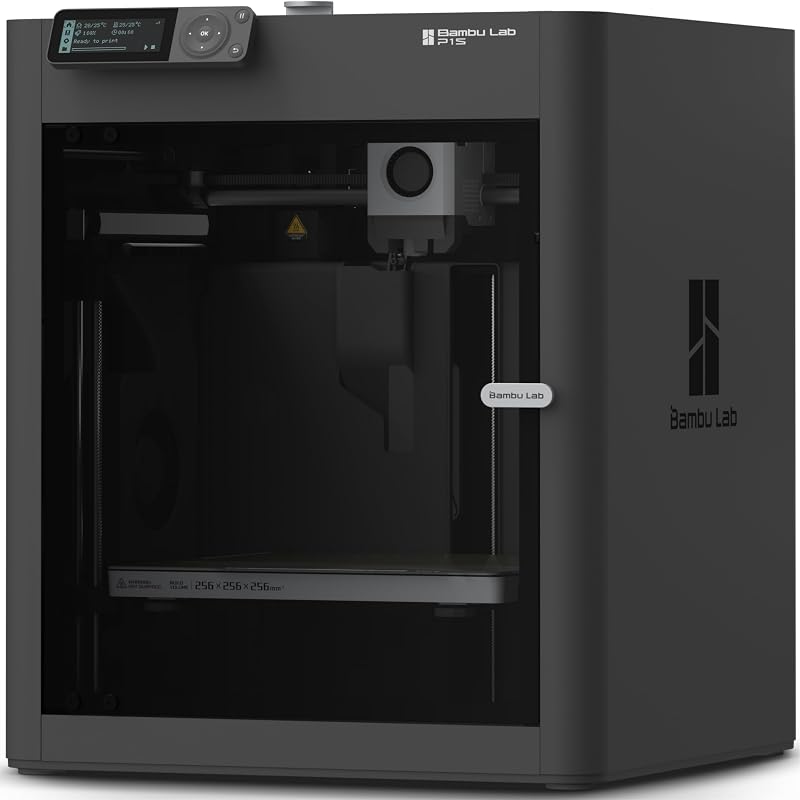
The Beginner-Friendly Ecosystem with MakerWorld Model listing offers the standalone Bambu Lab P1S enclosed CoreXY 3D printer. With its fully enclosed build chamber, high-speed precision motion system, and direct access to curated 3D model libraries, it delivers a clean, quiet desktop fabrication environment right out of the box. Shoppers who prioritize an enclosed print area to control draft temperatures and dampen mechanical noise without opening circuit board panels will appreciate this turn-key option.
Final Verdict
The Creality Ender 3 Silent Board stands out as one of the most practical and impactful hardware enhancements available for older open-frame 3D printers. By swapping legacy motor drivers for the ultra-quiet TMC2225 chipset, it effectively eliminates the high-pitched harmonic buzzing that often makes home 3D printing intrusive. Running under 50 decibels, the V4.2.7 board brings civilized acoustic performance to family spaces, allowing long-duration prints to run day or night without irritation.
With its 24V power compatibility, pre-installed bootloader, and Marlin 2.0.1 firmware foundation, this 4.2-ounce mainboard provides a reliable, cost-effective way to modernize a trusted machine. While it does require careful terminal wiring and basic firmware flashing for certain printer models, the long-term benefit of whisper-quiet operation makes the effort well worthwhile. For families seeking to maximize the value and daily usability of their Ender 3 series printer, the V4.2.7 silent board is an outstanding hardware upgrade.
FAQ
Does the Creality Ender 3 Silent Board eliminate fan noise?
No, the silent motherboard specifically targets stepper motor noise using TMC2225 drivers. The cooling fans on the hotend, part cooling duct, and power supply continue to run at their normal volume, though overall operating sound remains under 50 decibels.
How do you update the firmware on the V4.2.7 silent board?
Firmware updating is completed via micro-SD card. Copy the correct V4.2.7 firmware file onto a formatted SD card with no other files, power off and unplug the printer, insert the card and power cord, power the printer on, and wait 10 seconds for the pre-installed bootloader to finish flashing.
Is this motherboard directly compatible with the Creality Ender 3 Pro?
Yes, the V4.2.7 mainboard is compatible with the Ender 3 Pro, Ender 3, Ender 3 V2, Ender 3 Max, and Neo series. While it is factory plug-and-play for the base Ender 3, owners of the Ender 3 Pro must flash the corresponding Ender 3 Pro V4.2.7 firmware file via SD card before printing.
Does the silent board come with a bootloader pre-installed?
Yes, the board features a pre-installed bootloader alongside Creality firmware based on Marlin 2.0.1, eliminating the need for external ISP burners or Arduino programming boards when updating firmware.
What tools are required for the ender 3 silent motherboard installation?
You will need the standard hex keys that came with your 3D printer to open the electronics enclosure lid and unmount the board, along with a small flat-head or terminal screwdriver to loosen and tighten the wire terminal blocks.